
You signed up for LinkedIn and now you are wondering how to setup an effective LinkedIn profile.
LinkedIn is an amazing resource for students and professionals alike, but it can be a wasted resource if you have not completed and optimized your profile for future success.
Whether you are a student or professional, or a new LinkedIn user or old user, this article will include tips for you to better setup an effective LinkedIn profile.
(Related: Why Should I be on LinkedIn? 7 Reasons)
It is important to create an effective LinkedIn profile so that you can display yourself in your best light.
In this article I walk you through how to setup an effective LinkedIn profile.
Support The Public Health Millennial on BuyMeACoffee
Cover Photo
Though the cover photo is not an essential part of LinkedIn profile, it can really help attract more connections than the default LinkedIn cover photo.
If you are including a cover photo, remember you need to have an image that covers the entire banner size at the top of your LinkedIn profile. It may be best to upload a few different images to see which one works best for your profile before deciding on one.
The ideal cover image will be in the dimensions of 1584px X 396px.
I suggest that your cover image be either related to your field (and/or interest) or something that is aesthetically pleasing to persons viewing your profile or when users are searching for new connections.
Profile Photo (The Headshot)
You should be using a professional, high-quality image for your LinkedIn profile photo. This should be a headshot that showcases your beautiful face.
Pro Tip: If possible, you should not have your body and face facing towards the LEFT in your LinkedIn profile photo.
The reason for this is that you show up in the LinkedIn feed on the left of the screen and naturally the direction you are facing is where you will draw attention towards. So when possible try to face towards the right.
However, this probably will not affect anything related to your career and is more of a personal and aesthetic preference.
It is more aesthetically pleasing that you are facing inward of the screen and not outward. This also helps lead persons eyes into the page and therefore to your content.
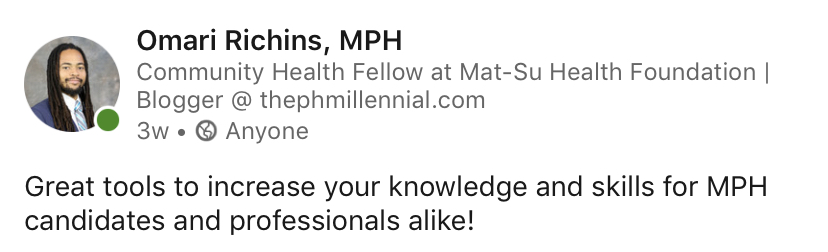
Intro
Your Intro is the first thing that someone sees when they land on your profile. So make sure that you keep it updated.

The Intro section contains (Profile + Cover Photo) and:
- Your First and Last Name
- Headline
- Current Employer
- University Attended
- Your Current Location
- Number of LinkedIn Connections
It also includes a bit of your summary which I talk about after the Intro section.
First and last name
Just use your real first and last name. I would suggest you leave out nicknames unless this is part of your personal branding experience.
Additionally, you should add your qualifications and certifications after your last name.
For example:
- John Doe, MSW, MPH, CPH
- Jane Word, RN, MSPH
Headline
Your headline is one of the most important parts of your profile. This is because it is one of the first things people see.
Your headline shows up:
- On content you share in your feed
- For google searches
- In suggestions for other people to follow
- For your “about you” and when someone LinkedIn searches

Ensure you are rocking your headline. Your headline is generally your current position and company or if you’re a student then the degree you’re pursuing.
However, your headline doesn’t have to be your current job title, especially if you want to be found for specific search keywords like in the case of of looking for a new job.
LinkedIn uses the keywords you use in your headline to help you show up more when other LinkedIn users search for those keywords. Be sure to use this to your advantage.
Job searchers tip: use keywords such as #ONO (Open to New Opportunities) in your headline.
Current POSITION
I don’t have to say more. Enter your current position that you are working at.
Education
Add the last school that you have attended and/or graduated from. This is more important for students rather than professionals.
Industry
Search through the industries that LinkedIn has available and choose the one that aligns best with your current position or the field that you want to work in.

About – Summary
Make sure the fill out your about section as it is the last visible portion of the Intro Section when someone views your LinkedIn profile.
The LinkedIn summary is part of the first impression to other LinkedIn users. Therefore, you should be sure to always have this updated especially when starting new jobs.
This is your time to display your career in the context you’d like while choosing how to write it and what to highlight and share with readers.
Note that LinkedIn only shows the first 300 characters, which is approximately 3 lines, before readers have to click ‘see more’.
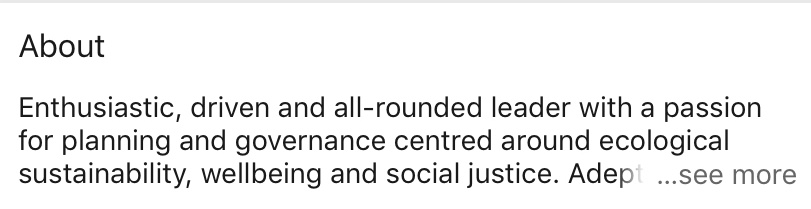
Therefore, you will want to start off your LinkedIn summary with a bang to capture the readers attention. You should ideally include information that you want recruiters or hiring managers to see in these first few sentences.
You can also optimize your LinkedIn summary with relevant keywords that you would like recruiters and hiring managers to search to find you. You can test out different keywords simply by typing them into the LinkedIn search box and seeing what appears there.
Be sure to share some personality in your LinkedIn summary as this is the only part of your LinkedIn profile that you can tailor it exactly how you would like.
Some people say, that is good to leave a call to action at the end of your summary and include some contact information such as an email or phone number. This is totally up to you, but placing an email here will do you no harm and will reduce the steps it takes someone to share information with you.
Here is an article on 10 examples of LinkedIn Profile Summaries.
Experience
The Experience section is a great way for people to understand your professional experiences. It also helps in the optimization of your LinkedIn profile for keyword searches done for profession.
This is where you will want to display your current and past job titles.
Experiences are displayed in the format:
- Job Title
- Company Name
- Date started – Date end/Present
- Location (City, State)
- Details
Details – for the details section there is a lot of differing opinions as to what exactly to write. Some say it should be written as Resume/CV bullet list, while others say that a couple sentence summarization works as well.
I think bullet list are the better choice just because it is a lot easier to scan through to see different job task.
Also on LinkedIn, you can use the first person when writing details. Which is not recommended for Resumes and CVs.
Additionally, I don’t think you should include all the information from your Resume/CV in your LinkedIn Experience section.
I say this because you don’t want recruiters to get all your experiences before an interview. Highlight a few of the task you did, but perhaps leave out 1 or 2 bullets from your actual Resume/CV.
Education
Add all the schools that you have attended and the relevant degree that you are attaining or have already received.
Include other relevant details about your education experience like: field of study, societies and activities.
Volunteering
Volunteering section is exactly like the ‘Experience Section’ mentioned above. Follow those instructions for that section above.
The only difference from the ‘Experience Section’ would be to include all, and maybe even more, details of your volunteer experiences than on your Resume/CV.
Skills & Endorsements
Skills & Endorsements can be highly useful for both for other LinkedIn users and recruiters looking to hire you. It also helps when you are searching for jobs on LinkedIn as LinkedIn highlights the overlapping skills you have that the job position requires.
The Skills & Endorsements allow you to add keywords for professional skills to your profile. You are also able to choose 3 Top Skills that will be shown at the top of this section.
This can be used to optimize your profile for keywords while also allowing you to showcase the Skills that you have attained or are working towards higher proficiency.
Other LinkedIn users can endorse you for skills that you have chosen and this shows up on your profile.
Pro tip: Choose Skills that you will need for the position you want to be hired for.
For example: If you are a student and you know you want to be working in project management, even if you don’t have much experience in it, you should place this on your Skills lists.
This will allow you to know what skills you need to develop more, and as you do get experience it will make it easier for others to endorse you for it which will allow you to be a more competitive candidate when you are applying to jobs through LinkedIn.
Accomplishments
Accomplishments are a great way for you to highlight different experiences you have had outside of your work experiences, volunteering and education.
The different accomplishments you can add to your profile are:
- Publications
- Patents
- Courses
- Projects
- Honors & Awards
- Test Scores
- Languages Spoken
- Organizations
You should use these to highlight experiences that will help build your professional persona.
Contact
When you created your LinkedIn profile, you should make a custom URL for your profile. Essentially, this will be best if it is something simple like your name followed by your degree, if applicable.
You should add your email address so that you can be reached with potential job opportunities and other potential experiences from other LinkedIn users.
Additionally you can add your phone number, but this is not absolutely necessary.
Lastly, you can add different ‘Topics for contacting’ that people can contact you about. This is also not necessary, but includes:
- Mentoring
- Getting coffee
- Contracting and freelancing
- Paid consulting, etc.
Recommendations
LinkedIn also allows you to display recommendations from other LinkedIn users on your profile. You should only seek recommendations for persons you have worked for or worked closely with. This can help
Recommendations can really help you, but you have to ensure that the recommendations you get are of a high quality and from person’s you would actually ask for references outside of LinkedIn.
If you want a recommendation, you can go to:
- ‘Add profile section’ at the top of your LinkedIn profile
- Go to ‘Additional Information’
- Click ‘Request a Recommendation’
Recommendations can be thought of as similarly to a reference.
Conclusion
LinkedIn continues to be the leading platform for professionals and students going into the professional world. With this being said, you need to create an effective LinkedIn profile that will help you in getting your next job or make that next important connection.
When it comes to your LinkedIn profile, the best thing you could do it just complete it! Complete every section and thoughtfully full out all the information.
LinkedIn can be a great resource for getting your next job, so it is imperative that you keep your profile updated so that you can attract relevant recruiters and hiring managers.
What do you think is the most important part of your LinkedIn profile?